The Client/Server Model
During our time going through the CodeHS curriculum, we learned the fundamentals of programming using Javascript. Javascript is a programming language that was built to control what developers call the front-end of a web application. The front-end of a web application refers to the portion of a website that is delivered to a user’s computer by the server. The back-end of a website is the portion of the web application that is run on the server.

If the user then logs into their account by entering their credentials, the login form sends the information to the server and the program on the server checks the information that the user sent with the information in the database, which is also stored on the server. If the information is correct, the program on the server will send the user the homepage with their personal information on it, including their latest score on Cookie Clicker.
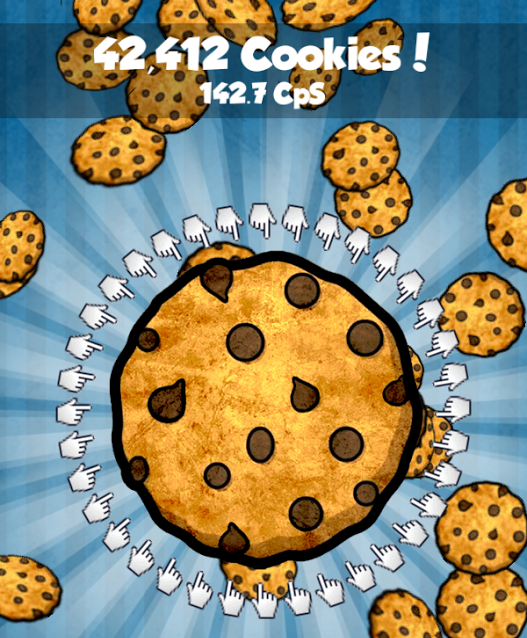
In the web application described above, the portion that received information from the user and interacted with the database is called the back-end and the portion that ran the javascript game in the webpage that is running on the user’s computer is called the front-end.
By the end of this lesson series, we will built the front-end of a web application by using HTML, CSS and the Skeleton boilerplate to create a responsive website. Once we have the website constructed, we will create a Cookie Clicker clone on one of it’s pages using a basic set of javascript commands. After the web application is completed, we will build the back-end using PHP, SQL and JSON to store and retrieve login and score information from a database.
Let’s start our journey by learning about HTML.
HTML
During this first tutorial, we will first learn how to first build a website using HTML and control its visual characteristics using CSS. Once we learn the basics of how HTML tags are used in conjunction with CSS to design website layouts, we will introduce the CSS boilerplate Skeleton, which is used to add responsivity to a website. Responsive websites are those which are built to be viewed from mobile devices that have different screen sizes.
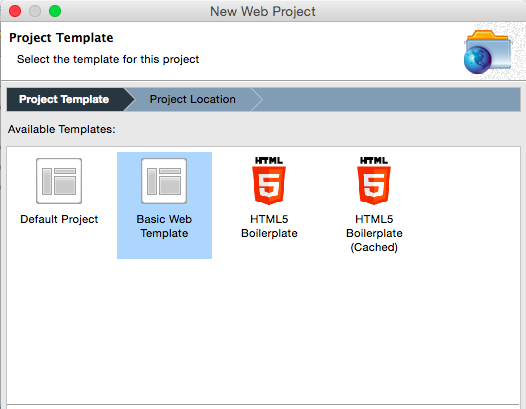
In your new project, you will have an ‘index.html’ file. Open it up and you will see the following tags:
<!DOCTYPE HTML PUBLIC "-//W3C//DTD HTML 4.01 Transitional//EN"
"http://www.w3.org/TR/html4/loose.dtd">
<html xmlns="http://www.w3.org/1999/xhtml">
    <head>
        <meta http-equiv="Content-Type" content="text/html; charset=utf-8" />
        <title> New Web Project</title>
    </head>
    <body>
        <h1>New Web Project Page</h1>
    </body>
</html>
We can see that there are two types of <tags>, ones that only have these <carrots> and ones that have the <carrots> and also include a forward s/ash. The reason for the difference is that the tag <html> signifies the beginning of a HTML document and </html> signifies the end of one. <title> refers to the beginning of the title and </title> refers to the end of the title and so on.

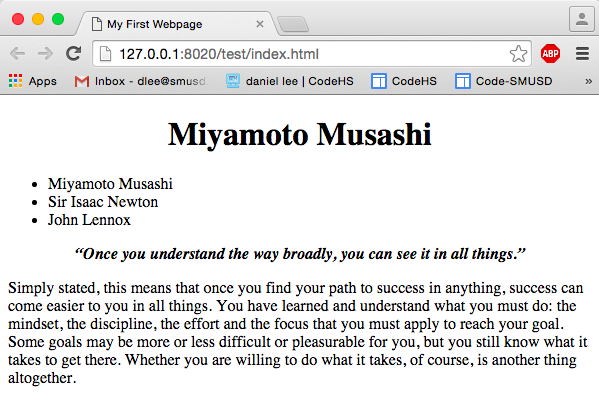
Miyamoto Musashi
“Once you understand the way broadly, you can see it in all things.”
Simply stated, this means that once you find your path to success in anything, success can come easier to you in all things. You have learned and understand what you must do: the mindset, the discipline, the effort and the focus that you must apply to reach your goal. Some goals may be more or less difficult or pleasurable for you, but you still know what it takes to get there. Whether you are willing to do what it takes, of course, is another thing altogether.
Self confidence is gained primarily from actual experiences. A past success or achievement gives us confidence that we can achieve it again or do something similar. Because we have this history of success, it becomes easier for us to take that important first step in other challenges. The result is that we become part of a positive cycle where the more success we experience the more confident we become and so on. This is why confident people become more and more confident and successful.
Most people have succeeded in something. When faced with a new challenge in a different area, don't say that you can't do it or that you are trying to do it if you have not succeeded, because you already know the type of effort and discipline that success requires. Just honestly say that you don't want to do it, and move along rather than continue to confront yourself with something you really have no desire for. Your desire not to do it is possibly more important to you for whatever gain you get out of that decision.

<h1><center>Miyamoto Musashi</center></h1>
<center><b><i>“Once you understand the way broadly, you can see it in all things.”</i></b></center>
<p>Simply stated, this means that once you find your path to success in anything, success can come easier to you in all things. You have learned and understand what you must do: the mindset, the discipline, the effort and the focus that you must apply to reach your goal. Some goals may be more or less difficult or pleasurable for you, but you still know what it takes to get there. Whether you are willing to do what it takes, of course, is another thing altogether.</p>
<p>Self confidence is gained primarily from actual experiences. A past success or achievement gives us confidence that we can achieve it again or do something similar. Because we have this history of success, it becomes easier for us to take that important first step in other challenges. The result is that we become part of a positive cycle where the more success we experience the more confident we become and so on. This is why confident people become more and more confident and successful.</p>
<p>Most people have succeeded in something. When faced with a new challenge in a different area, don't say that you can't do it or that you are trying to do it if you have not succeeded, because you already know the type of effort and discipline that success requires. Just honestly say that you don't want to do it, and move along rather than continue to confront yourself with something you really have no desire for. Your desire not to do it is possibly more important to you for whatever gain you get out of that decision.</p>

Now You Try:
Create two other web pages similar to ‘index’. Be sure each web page has all of the correct tags and that each includes all the tags we have went over so far. Use quotes that resonate with you and copy and paste text into the web pages. Be sure to name each new web page the first name of the person who spoke the quote.
Links
Let’s link up your three web pages using hyperlinks. Add the following code to ‘index’ just under the name “Miyamoto Musashi”:
<h1><center>Miyamoto Musashi</center></h1>

<ul>
	<li>Miyamoto Musashi
	<li>Sir Isaac Newton
	<li>John Lennox
</ul>
 ...
<ul>
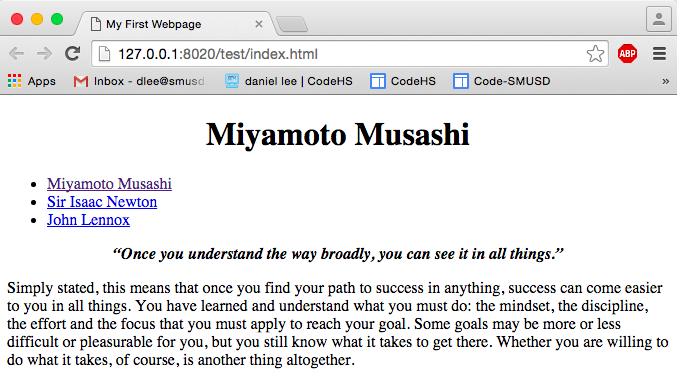
	<li><a href="index.html">Miyamoto Musashi</a>
	<li><a href="isaac.html">Sir Isaac Newton</a>
	<li><a href="john.html">John Lennox</a>
</ul>
Now You Try:
Copy and paste the set of hyperlinks to the other two pages so that you are able to travel to and from each page freely without getting stuck.
Finally, let's add some text at the bottom of our page that will contain copywrite information and the website name. Add the following code at the bottom of your web page:
<p><center>© Code Creative - Website Design by Daniel Lee</center></p>If you refresh your 'index.html', you will see that the first version of your webpage is complete. The content is fine, however don't you think we could do a little work on the presentation?
Before moving forward check your 'index.html' with mine at the following url: codecreative.us/intro_html_css/no_css.html
CSS
The hyperlinks you have added to your website look nothing like any site you have ever visited. However, if you looked at the source code for every site you have ever visited, the hyperlinks are contained in an unordered list which include bullet points. You must be asking “If this is so, why aren’t all the links on my favorite website as unattractive as mine?” The answer is three words: Cascading Style Sheets(CSS).
CSS became popular in the year 2000 as a way of separating presentation from content. Take a look at the Zen Garden CSS website and click on several of the sites listed. After perusing several sites, it should become clear that the content on the sites are the same and it is simply the presentation that is changing. You probably guessed it, each web page uses the same HTML file and a different CSS file. This is the power of CSS.
Let’s incorporate CSS in our website!

Just creating the CSS file does nothing magically to change our HTML files, we need to add classes, id's, properties and values to make presentational changes to our web pages. Add the following code to ‘styles.css’:
.nav{
    border:1px solid #ccc;
    border-width:1px 0px 1px 0px;
    text-align:center;
}
.nav li{
    display:inline;
}
.nav a{
    display:inline-block;
    padding:10px 10px 10px 10px;
}
Refresh your code and you will see that nothing has changed. This is because in our CSS file, we defined a new class called ‘nav’ however we didn’t apply the class to any element in our HTML document. A class is a set of properties for an element of an HTML document which is going to be used for multiple pages. Since we are going to apply these settings to all of the navigation links in our pages, we are using classes. Note that to create a class, we use the ‘.’ before the name of the class.
Let’s apply the ‘nav’ class by adding the following markup to our HTML document:
<ul class="nav">Refresh your ‘index.html’ and again there is no change to our web page. This is because we haven’t linked ‘index.html’ to ‘style.css’. We can do this by adding the following code to the head of ‘index.html’:
<li><a href="index.html">Miyamoto Musashi</a>
<li><a href="isaac.html">Sir Isaac Newton</a>
<li><a href="john.html">John Lennox</a>
</ul>
<head>
	...
	<link rel="stylesheet" type="text/css" href="styles.css">
</head>

.nav li{
    display:inline;
}
.nav a{
    display:inline-block;
    padding:10px 10px 10px 10px;
}
It’s important to note that here we are defining a special rule for the class ‘nav’. Here the first class is saying for any <li> inside of an element using the ‘nav’ class, apply these properties. Following the same convention, the second class is defining a set of properties that should be used for any <a> inside of an element using the ‘nav’ class. This convention isn’t used very often, however it is usually used to define the properties of a set of hyperlinks and you should be familiar with what is going on there.
Now You Try:
Figure out what each property does in your ‘nav’ class by experimenting on your website and doing research on the following website: www.w3schools.com. To find the function of a property, click the magnifying glass, type in the property and click on the internal links showing in the results list.
Now that you have a clear idea of what each property does in the code you added to ‘styles.css’, let’s add to the properties so that your navigation links aren’t underlined and they are the font color that you want them to be. Add the following properties to your file:
.nav a{
    text-decoration: none;
    color: #606060;
    ...
}
Now if you refresh your web page, you will see that your links are no longer underlined and they are a mustard color. If you don’t like this color, visit http://goo.gl/ZR1m0Z and choose from amongst millions of other possible colors. The last thing you should do before moving past the navigation links is to make it so that the color of the navigation links change when your mouse rolls over them. To do this, add the following CSS class to your file:
.nav a:hover{
    color: #ffffff;
}
Now You Try:
Personalize your webpage and choose the colors that you want for your font and rollover.
Now You Try:
Our webpages look a bit off, let’s fix that by centering the titles and quotes of each page and adding space above and below by adding <p> around the quote.
One last thing I want to go over before talking about designing the structure of a webpage is how to add an image. Let’s start by adding an image. Find the url to an image you want to add to your webpage and add the following code in your text, just after the navigation buttons:
<ul class="nav">Refresh your code and you will see the picture you chose in your webpage! The picture probably looks a little bit off, so define a more suitable ‘width’ and ‘height’ and let’s align the picture to the left by adding the following attribute:
<li><a href="index.html">Miyamoto Musashi</a>
<li><a href="isaac.html">Sir Isaac Newton</a>
<li><a href="john.html">John Lennox</a>
</ul>
…
<img src=”http://goo.gl/ouJaZy” width=’100’ height=’100’>
...
… <img src=”http://goo.gl/ouJaZy” width=’100’ height=’100’ align=’left’>Great, now our picture is a decent size and is neatly aligned to the left with the text wrapping around it.
...
Now You Try:
Format your website so all the pages are uniformly arranged. Be sure that each page starts with a picture that is aligned left.
Basic HTML5 Tags
In HTML5, we have 5 structure tags: <header>, <navigation>, <article>, <section>, and <footer>. When looking at the diagram to the right, it becomes obvious which portion of the website is designated by which tag. The beauty of these tags is that we can define their characteristics in our CSS file and quickly create a website that has beautiful presentation. Let’s start by adding the tags to our ‘index.html’. Add the following markup to the <body> of your file:
<header>Let’s place the name “Miyamoto Musashi” in <header>, the unordered list in <navigation>, and the article in <article>. Since our article doesn’t have any sections, we will simply place all of our text inside of <article>. Lastly, let’s add the following text to <footer>:
</header>
<nav>
</nav>
<article>
</article>
<footer>
</footer>
© Code Creative - Website Design by Daniel LeeNow that we have all of our content in the correct structure tags, we can begin using our CSS file to make each one look the way we want. Add the following code to the top of ‘styles.css’:
header{
}

nav{
}

article{
}

footer{
}
Notice that in the code above, that we aren’t using the ‘.’ operator to signify the creation of a new class. We are simply stating the names of the tags. This is valid because these tags are built-in to HTML5. This would be the same process if we wanted to define a set of styles for the <p> tag, or any other standard tag. Let’s start stylizing your <header>. First, notice that in your HTML code, you have placed the name “Miyamoto Musashi” in <bold>, <centered> and <h1> tags. Let’s get rid of those tags in the HTML because we can simply define the styles that we want in our CSS file. Delete the tags from the header of ‘index.html’ and add the following code to ‘styles.css’:
header{
	font-size: 120px;
	text-align: center;
	font-weight: bold;
}
If you look up the CSS properties on w3schools, you will notice that the sum effect of them all results in the same effect as the tags you had in your HTML file. As a general rule, stylizing elements in the CSS file is prefered over stylizing in-line, which means placing style tags in the HTML file
Let’s continue our stylizing of ‘index.html’ by adding the following CSS properties:
article{
	font-size: 30px;
}

footer{
	font-size: 30px;
	text-align: center;
}

To use google fonts, first go to this url: https://www.google.com/fonts. Then scroll down until you come across a font that pleases your eyes. Click on the arrow that points to the right and if you scroll down to #3, you will be given a <link> tag that you must copy and paste into the <head> of every web page that is going to use this font. I like the font ‘Allura’, so I’m going to paste the following tag into my head just above the <link> tag that contains the location of my CSS file:
<head>Now, going back to Google Fonts, scroll down to #4 and you are given a CSS property that you can use in your CSS file. Let’s use the following property in our <header>:
<title>
My First Website
</title>
<link href='https://fonts.googleapis.com/css?family=Allura' rel='stylesheet' type='text/css'>
<link rel="stylesheet" type="text/css" href="styles2.css">
</head>
header{
	...
	font-family: 'Allura', cursive;
}
Refresh your page and you should see that now your webpage uses the Google Font. Let’s now use the following fonts in the <nav> and <article>:
<link href='https://fonts.googleapis.com/css?family=Poiret+One' rel='stylesheet' type='text/css'>
<link href='https://fonts.googleapis.com/css?family=Fredericka+the+Great' rel='stylesheet' type='text/css'>


font-family: 'Fredericka the Great', cursive;
font-family: 'Poiret One', cursive;
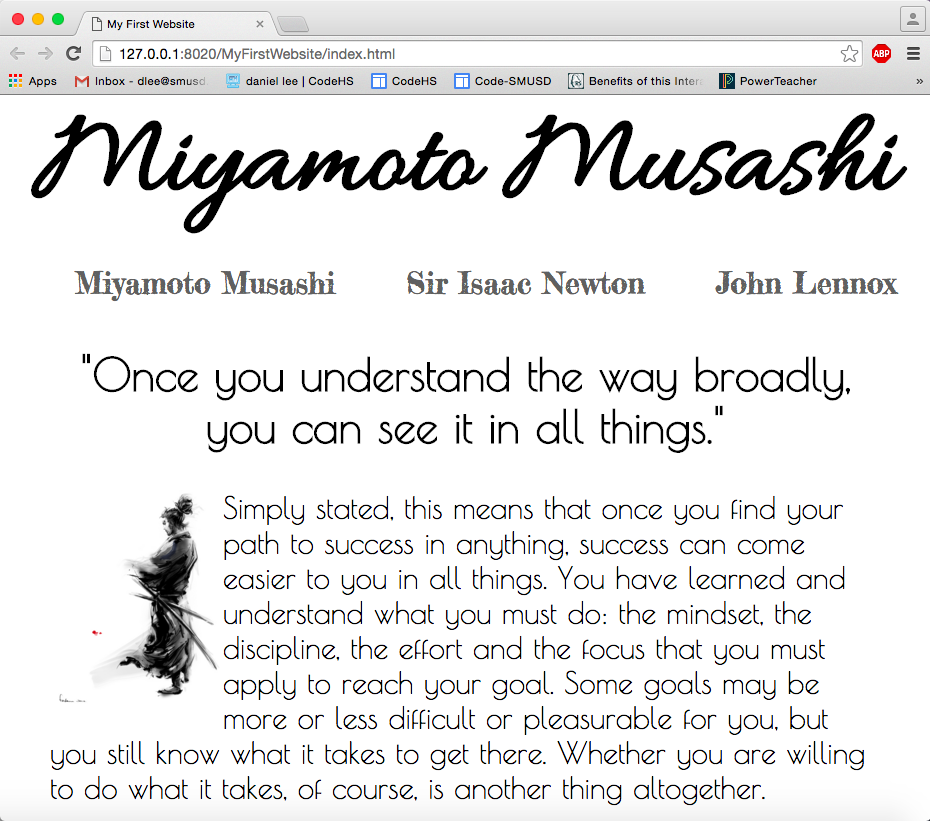
Great, your web page is starting to shape up!
Let’s use an image for the background. You will need to go to Google and search for an image. Be sure that after you type in your search criteria and you click on the ‘image’ tab, that you click on ‘More tools -> Size -> Large’. This will insure that you are using pictures that will look sharp on the largest of monitors. Be aware that you need to click on the image that you want to use, then click on ‘View Image’. You need to hold down ‘control’ and choose ‘Save image as’.
Be sure that you create a new folder in your website’s folder called ‘images’. The ‘images’ folder needs to be on the same level as ‘index.html’. You the following background image if you are following this tutorial as an example: http://goo.gl/oHN82H
Now that everything is in place, we need to add the background as the background of ‘index.html’. First, add the following code to your css file:
#mm{
	background: url(images/background.jpg) no-repeat;
	-webkit-background-size: cover;
	-moz-background-size: cover;
	-o-background-size: cover;
	background-size: cover;
}
Here, we are defining an id called ‘mm’. An id is different from a class in that an id defines a set of properties that are only to be used once in the website. In our case, we will use this background image for the page containing Miyamoto Musashi’s quote and for no other, thus we are using an id instead of a class.
To use the id, you simply add the following code to your ‘index.html’:
...Now you should see the image set as the background for ‘index.html’ and that it is 100% of the screen. There are many things we could have done with the background image, but I chose to set the properties so that the image is fixed and 100% of the screen. Each of the properties in the id can be looked up on w3schools for more information.
<body id="mm">
...
</body>
The buttons we are using can use some sprucing up, let’s focus some attention on them. First, I want to define the buttons to have a border. Not only that, I want the border to be rounded at the corners. To do this, add the following properties to ‘styles.css’:
.nav a{
	...
	border-radius: 15px;
	border: 1px solid #404040;
}

.nav a{
	...
	background: rgb(204, 204, 204); /* Fallback for older browsers without RGBA-support */
	background: rgba(204, 204, 204, 0.1);
}
RGBA is a color scheme just like hexadecimal is. You can convert between the two using Photoshop. The color represented by (204, 204, 204) is a dark gray and the last argument specifies the amount of transparency to use. The value ‘0.0’ means very transparent and ‘1.0’ means no transparency. ‘0.1’ looks good, so let’s stick with that.
One last thing for the buttons would be to change the background color on a mouse rollover. Let’s do that by adding the following property:
.nav a:hover{
	...
	background-color: #d8d8d8;
}
Now the buttons in the nav look good, but the amount of space between the header and nav looks a bit unbalanced. Let’s fix that with the following property:
header{
	...
	margin: 0px 0px -15px 0px;
}
We have already learned about the padding property, which specifies the amount of space inside an element. The margin property specified the amount of space on the outside of the element. The arguments for margin are arranged like a clock with the first value specifying the amount of space above the element, to the left, below and to the right of the element. We wanted all other aspects to stay the same, so I simply changed the bottom margin by a negative number to decrease the gap.
Now the header and nav look good. Let’s focus on the <article>. For the <article>, I only want a few changes and one of them is to add some padding to both sides of the element. Use the following property:
article{
	...
	padding: 0px 50px 0px 50px;
}
The other aspect is to remove the tags in ‘index.html’ around the quote and replace them with <h2>. Now everything looks good with the <article>.Lastly, we are at the <footer> and I want to add a top border to create a distinct separation between the two elements. I also want to create a transparent light-gray background color while keeping the text solid. Lastly, I want to add a lot of padding to the top and bottom of the element, making the footer appear larger. Add the following properties to your CSS file:
footer{
	...
	border-top: 1px solid #404040;
	padding: 30px 0px 30px 0px;
	background: rgb(204, 204, 204); /* Fallback for older browsers without RGBA-support */
	background: rgba(204, 204, 204, 0.5);
}

footer{
	...
	width:100%;
	height:100px;
	position:absolute;
	bottom:0;
	left:0;
}

Let's fix that by adding a wrapper div around everything in our body.
<body>
	<div class="wrapper">
		...
	</div>
</body>
Once we have the wrapper div in place, then, you must add the following properties for the "wrapper" class:
.wrapper {
	min-height:100%;
	position:relative;
}
Now, everything should look great, except that small white space around the edge of the footer. Let’s get rid of that by adding the following code to the top of your CSS file:
body{
	margin: 0;
	padding: 0;
}
Refresh your 'index.html' and you should see that everything on your web page looks good. Before moving forward, double check your webpage with the one found at codecreative.us
Now You Try:
Complete the other two pages using your own properties and Google Fonts to create a warm presentation. You are allowed to copy and paste text for this assignment.
Extra Credit: The Fan Website
Create a fan website about something you are passionate about. Use the following guidelines when designing your website.
Your webpage should have a homepage, along with at least three other pages exploring other aspects of your interest. Be sure to include the following:
- stylized links.
- include a header, nav, article, and footer per page.
- incorporate ‘styles.css’ which uses classes to define presentation.
- each page should have a background picture defined in ‘styles.css’.
- use at least 3 Google Fonts per web page, which can be the same for all pages.
- the article text must have at least 3 paragraphs which include at least 5 sentences each.
- include at least three inline pictures per page.
- include a stylized header and footer.
- uses a set of special properties for the navigation buttons.